
These fluffy and rich Raspberry White Chocolate Muffins are bursting with juicy raspberries and creamy white chocolate chips.

When it comes to muffins, there are a plethora of different options for flavors. From moist banana muffins like my Classic Banana Chocolate Chip Muffins to cozy Chocolate Chip Pumpkin Muffins or rich and decadent Double Chocolate Zucchini Muffins, there is a muffin for every occasion!
Of course, you cannot forget muffins that are bursting with juicy berries and fruit like these Strawberry Rhubarb Muffins or Blueberry Pecan Muffins! These raspberry muffins are full of juicy and tart raspberries to offset the sweetness of the white chocolate.
Jump to:

⭐️ Why You Need to Make This Recipe
- Flavor - Like in my Raspberry White Chocolate Scones, tart raspberries and creamy white chocolate is a wonderful flavor combination.
- Texture - These muffins are incredibly moist and fluffy in texture from the butter, oil, and sour cream in the batter.
- Method - With no mixer required, this batter is quick and easy to whip up and have fresh muffins in no time!
🧈 Ingredients
Here are the ingredients needed to make these fluffy white chocolate raspberry muffins.

Ingredient Notes
- Fat - A combination of oil and butter is used for optimal buttery flavor and moist texture. I use salted butter but you could add an additional ⅛ teaspoon of salt to the recipe if using unsalted butter.
- Sour Cream - Helps to make the muffins extra moist and rich. You could use plain unsweetened yogurt instead.
- Frozen Raspberries - I only recommend frozen raspberries for this recipe to prevent all the juices from fresh raspberries from bleeding into the batter.
- White Chocolate - Either chopped white chocolate or white chocolate chips work.
See the recipe card for the full list of ingredients with measurements.
📃 Instructions
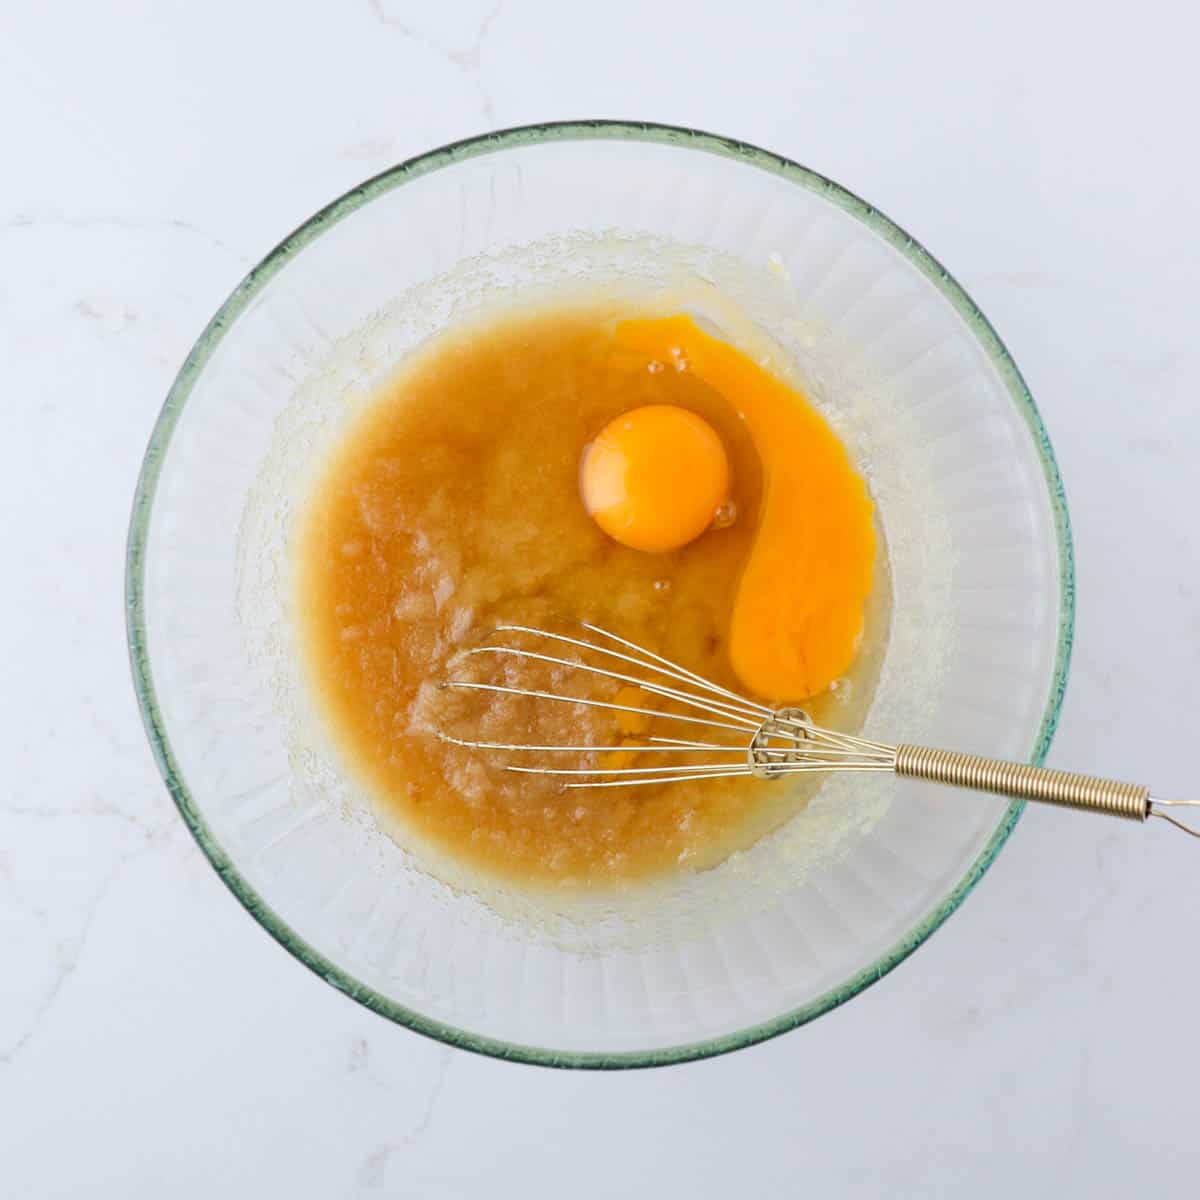
Step 1: Whisk together the melted butter, oil, white sugar, brown sugar, and vanilla. Add the eggs and whisk.

Step 2: Add the sour cream and milk and whisk until smooth.

Step 3: In a separate bowl, whisk together the flour, baking powder, and salt. Fold the frozen raspberries and white chocolate chips into the flour mixture.

Step 4: Add the flour/berry mixture to the wet ingredients.

Step 5: Mix just until no streaks of flour remain being very careful not to overmix.

Step 6: Scoop into prepared muffin tins, distributing evenly between 18 muffin cups.
Bake in a 400℉ oven for 5 minutes before reducing the temperature to 350℉ for another 15-20 minutes or until a tester inserted into the center comes out clean.
💡 Top Tip
Mix the batter until just incorporated to prevent tough and dense muffins as well as to reduce the bleeding of the raspberry juice into the batter.
❓ Recipe FAQs
You could omit the white chocolate for plain raspberry muffins or use semisweet chocolate instead.
I do not recommend fresh raspberries for this recipe as the juices will bleed out while mixing into the thick batter and introduce too much moisture affecting the texture.
You can use plain unsweetened yogurt in place of sour cream.
Store fully cooled muffins in an airtight container at room temperature for up to 4 days or freeze for longer. Place a paper towel on the bottom of the container to help prevent the muffins from becoming too soggy.

🤍 More White Chocolate Recipes
Looking for other recipes with white chocolate? Try these:


If you tried these White Chocolate Raspberry Muffins or any other recipe on my website, please leave a ⭐️ star rating and write a little note telling me how it went in the comments below. Thank you!!
📖 Recipe

Raspberry White Chocolate Muffins
Equipment
- 12-count muffin tin(s)
- muffin liners or non-stick spray
- mixing bowl
- measuring cups & spoons
- whisk
- Spatula
Ingredients
- ¼ cup salted butter, melted *
- ⅓ cup neutral-flavored cooking oil
- ⅔ cup white sugar
- ⅓ cup brown sugar, packed
- 2 eggs
- 1 teaspoon vanilla extract
- ½ cup sour cream *
- ½ cup milk
- 2 cups all-purpose flour
- 1 tablespoon baking powder
- ½ teaspoon salt
- 1 ½ cups frozen raspberries *
- ¾ cup white chocolate chips (or chopped white chocolate)
Instructions
- Preheat the oven to 400℉. Prepare muffin tins with 18 muffin liners or spray with non-stick cooking spray.
- In a large mixing bowl, whisk together the melted butter, oil, sugar, and brown sugar until combined. Add the eggs and vanilla and continue whisking. Add the sour cream and milk and whisk just until fully incorporated and smooth.
- In another bowl, whisk together the flour, baking powder, salt, frozen raspberries, and white chocolate chips. Add to the wet ingredients and gently fold together just until no clumps of unmixed flour remain. Do not overmix or the raspberries will bleed into the batter!
- Divide the batter evenly between all 18 prepared muffin liners. Bake in the 400℉ preheated oven for 5 minutes. Then, turn the oven down to 350℉ and bake for an additional 15-20 minutes or until a toothpick inserted into the center comes out dry. Let cool in the pan for 10 minutes before transferring to a wire rack to finish cooling. Enjoy!
Notes
- Add an additional ⅛ teaspoon of salt to the recipe if using unsalted butter.
- Plain unsweetened yogurt may be used instead of sour cream.
- I only recommend frozen raspberries for this recipe to prevent all the juices from fresh raspberries from bleeding into the batter.


Faith Tucker
This was my first time making muffins since I was 11. I was very intimidated because the last time I made muffins didn’t go so well, but this was a very easy recipe to follow, as all of Naomi‘s recipes are. These are probably the best muffins I’ve ever had. They are addictive and delicious and so so yummy!!
Naomi Andres
Yay! Thank you for reviewing this recipe! I agree, they are so delicious!!